Wednesday, December 22, 2010

DIY: Must be in the genes

People ask if I come from a creative family and I reply, "Well, I get my insanity from my mom. Does that count?"
Deny it as we may, we eventually turn into our parents.

Exhibit A.
Much like my mother in years past, I spent countless hours baking holiday cookies over the past several weeks. Why? To give away, of course! There's just something rewarding about being able to send cookies to work with your husband, bring to church or give to your coworkers. You didn't think I made them to eat myself, did you?

Exhibit B.
Mom used to recruit my assistance in hand-making ornaments to give away as gifts. What did I do this year? Oh right, hand-made gifts for family and friends.

The apple certainly didn't fall far from the tree. Granted, the craft may be different, but the sentiment is the same. Love you mom!

Below are some examples of my mom's DIY specialty: Christmas stockings. She's hand-made Christmas stockings for every human and canine in our household. Since I couldn't sew a straight line if my life depended on it, I'll continue to defer this craft to my mom.


Thursday, December 9, 2010

Chocolate Peppermint Bark


I love flipping through Crate and Barrel's and Williams Sonoma's holiday catalogs, dreaming about one day owning an entire set of Christmas-themed dinnerware, cookware, and accessories. I also drool over all their seasonal treats. Last week, as I was drooling over chocolate and cookies in the catalogs I realized, "I can do that!" So here is my take on Chocolate Peppermint Bark.

Chocolate Peppermint Bark
1-12oz. bag white chocolate chips
1-12oz. bag semi-sweet chocolate chips (can substitute dark or milk chocolate)
1/2 c. crushed candy canes (about 4 regular sized candy canes)

Line a 9X9 baking pan with parchment paper. In a double boiler, melt one bag of chocolate chips until smooth. Pour chocolate into pan and spread evenly with a spatula. In the double boiler, melt the other bag of chocolate chips. Pour over first layer of chocolate and spread gently with spatula. Crush candy canes in a small food processor, or put in a heavy-duty ziploc bag and crush with a heavy skillet. Sprinkle crushed candy canes evenly over the chocolate. Place pan in freezer until chocolate has hardened. Remove chocolate from pan, remove any stuck parchment paper. Break into small pieces for serving. Stores for several weeks in airtight containers or ziploc bags.

This bark is easy to make and beautiful to bag up to give as little gifts to co-workers or teachers.

Tuesday, December 7, 2010

DIY Bath Salts

Ever since I realized I can order essential oils on Amazon for cheap, I've been going nuts with DIY aromatherapy projects. Some of these items may or may not be Christmas gifts, so I'm keeping mum for the most part. But this particular bath soak is so lovely, I can't keep it to myself. Tis' the season for colds and congestion, and this particular bath soak is wonderfully soothing for airways and achy muscles.

Cold Season Bath Salts

2 c. Sea Salt
1 c. Epsom Salt
1 c. Baking Soda
1/4 tsp. Eucalyptus oil
1/4 tsp. Tea Tree Oil

Mix everything together and store in ziplocs or mason jars.

This can also be used as a soothing foot soak, too!

Tuesday, November 30, 2010

Holiday 4-R's

Reduce, Reuse, Recycle, and Repurpose!

We haven't made much headway with holiday decorations...yet. I emphasize "yet" because my husband likes to protest premature holiday decorations and celebrations. Meaning, we probably won't get a tree put up until the second full week of December - and that's purposeful, not because we're procrastinators. Due to his Scrooge-like behavior (Bah-humbug!), I have to sneak decorations one at a time.

I started by repurposing the dining room centerpiece. This year, I'm trying to go for shabby-chic and used rusty jingle bells I picked up at an after-Christmas sale a few years ago.


I then moved on to redecorating my multiseasonal, multipurposeful pine cone wreath! I picked up cheapo ribbons from Target and went to town:

Saturday, November 27, 2010

Go-To Bread

The thought of making bread usually intimidates people (unless they have a breadmaker machine, which I think is cheating anyway). Around the holidays, I hand-make (and hand knead) several loaves of bread. I think bread is one of the most versitile gifts you can give.
Last year, I gave loaves of bread as "thank-yous" to neighbors who had loaned us miscellaneous items when we first moved into our home.
This Thanksgiving, I brought a loaf of bread as a gift for our generous hosts. This is a long-standing tradition in my family. Every year, my mom makes the same loaf of bread to bring to Thanksgiving. This no-knead bread is both visually appealing and delicious.

Finnish Rieska
2 c. lukewarm water
1 1/2 tsp. crushed caraway seeds
1 package active dry yeast (not "quick rise")
1 Tbsp. brown sugar
2 tsp. salt
1 c. pumpernickel rye, graham, or whole-wheat flour
3 c. bread flour

Glaze:
1 egg white beaten with 1 Tbsp. water
Fresh herbs: sage, chives

In large mixing bowl, stir together water, yeast, brown sugar, and salt. Let stand 5 minutes until yeast begins to foam. Stir in the dark flour, then bread flour and caraway seeds. Beat well. Cover with damp dish towel and allow dought to rise in warm place until doubled, about 1-2 hours. Cut a piece of parchment paper to fit a large pizza pan. Coat parchment paper with dark flour. Turn dough out onto paper and flatten with your hands to make a circle about 12 inches in diameter. Cover and let rise until puffy. Preheat oven to 375. Brush top of loaf with beaten egg white and water. Arrange fresh herbs in decorative pattern on the top. Brush loaf again with egg white, making sure to coat the herbs. Bake for 20 to 25 minutes until the loaf spring back when touched. Remove from oven and cool on a rack.

Here's about what it should look like:

Saturday, November 20, 2010

Garden Update

It may have taken a few months, but we now have our first peas!


Despite a few nights of cold temperatures (though it didn't frost in our backyard), we continue to have chilies (which I keep adding to my riesta), tomatoes, and blooms on our eggplants.


Perhaps one of the greatest benefits to gardening in Middle Georgia is this crazy-long growing season. Now that it's cooler, the plants seems happier and there is virtually no bug problem. Happy plants = happy gardener!

Tuesday, November 9, 2010

The Great Fall Tomato Harvest

Dear God of the garden,

We thank Thee for Thy mercy and protection during the first, second, and third frosts of the year. We exalt Thee for Thy provision of a bountiful harvest of tomatoes. Glory to God in the highest, Amen.


They may not be the prettiest tomatoes in the world, but you wouldn't be too pretty either if you survived three frosts, three nights in a row with nothing to protect you but a flannel sheet. As posted last week, we're also harvesting the larger green tomatoes. But these red(ish), ripe tomatoes I set my mind to tendering them to fruition. Patience pays.

In honor of our tomato bounty, I thought I'd share a recipe. This recipe was inspired by a recipe sent to me by a (vegan) college friend. She recently enjoyed vegan biscuits and gravy at the Grove Park Inn in Asheville, NC.

Kate's Tomato Gravy
2 T. Olive Oil
2 T. Flour
1 small onion, diced
1 c. green tomatoes, diced
1 can diced tomatoes
1 c. almond milk
1 t. lemon juice
Smoked paprika to taste (about 1 t.)
Tabasco sauce to taste (about 1 t.)
salt and pepper to taste

In a large saucepan heat olive oil over medium heat. Add onion and green tomatoes; sautee until soft. Add flour and stir until a thick paste forms (also called a roux). Gradually whisk in almond milk. Gradually whisk in the canned tomatoes (plus liquid) and lemon juice. The mixture should be the consistency of thick gravy. If too thick, gently whisk in more almond milk. Stir in paprika, tabasco, salt, and pepper. Adjust according to personal preference. Serve with biscuits.

Thursday, November 4, 2010

Garden Update

Nothing much came of the carrot and beet seeds I planted, but the greens (turnip, mustard, kale) seemed to do well despite hot temperatures early this fall. Now that it's cooling down, I'd expect the garden to start dying off. On the contrary! The two tomato plants that didn't produce anything all summer long are finally producing tomatoes. And in abundance, I might add! In anticipation of the coming first frost, Marcus harvested some green tomatoes (pictured below).

The pepper plants seem to not know when to stop producing also! We finally harvested some habanero peppers (pictured below), though we're not quite sure what to do with them.

Our eggplant plants are flowering again, so I'm keeping my fingers crossed that we'll get more eggplant this fall. I have a feeling in the next few days we'll be covering plants like crazy, including our more delicate herbs.

Saturday, October 23, 2010

Last week in Veganville

It's been a few weeks since I've posted a recipe. Since my husband returned from his deployment, we've finally started getting back into a normal routine, which happens to include weekly menu planning. If you haven't done it before, I would highly recommend menu planning. It is a HUGE stress reliever for us. We used to do a lot of this:
"What's for dinner?
"I dunno. What do you want?"
"Well what did we pull out?"
"Nothing."
"Okay. What do you want for take-out?"
And then we get frustrated with one another because we can't agree on take-out.
The best part about menu planning is how much money you save at the grocery store. I pick up weekly adds for our local grocery stores and sometimes menu plan based on what's on special that week. This past week, I saved $30 on my grocery bill using weekly ads and manufacturer's cupons. Booyah.
To make menu planning easier, we bought a magnetic dry-erase board to post in our kitchen. It helps us keep tabs on what's coming up (in case anything needs to thaw or soak), and also keeps a running grocery list. Since it's magnetic, we can attach cupons to the board that are either about to expire or are relevant to this week's menu.

Anyway, on to what you really care about: recipes!

The best part about this past week in Veganville? My husband eating several vegan or vegetarian meals without blinking an eye. One of the more deceptive meals (i.e. makes one think they're eating meat when they're actually not), was chili. Chili making was somewhat of a sacred art in my family growing up. My dad taught me how to make chili without a recipe and how to blend the spices for the perfect pot of chili. Since I think there's no right or wrong way to make chili - proportions of beans and spice change based on personal preference - I'll give you my general outline my vegan chili.

Nelson's Vegan Chili
Black beans*
Red beans*
Kidney beans*
Boca burger or Morningstar Mealstarter crumbles (optional)
Chopped onion
Garlic
Chopped carrot
Chopped celery
Chopped pepper**
Canned diced tomatoes
Tomato paste
Vegetable broth
Cumin
Chili Powder
Smoked paprika
Dry Bay Leaf
Secret ingredient***

*I buy dry beans (they're cheaper and have less sodium than canned beans). Please note dry beans require an extra step of soaking overnight (or 6-8 hours)
**Depending on how spicy you like your chili, you can use chopped bell pepper, jalepeno pepper, or serano pepper. With hot peppers like jalepenos and seranos, remove the seeds and white veins to limit the heat.
***I say "secret ingredient" because I think you ought to make your chili your own. Find a unique ingredient you think really "makes" the chili for you. I typically use the same secret ingredient my dad always used, but sometimes I'll throw in some other spices if I'm feeling adventurous.

Sautee onions, garlic, carrots, celery, and peppers in olive oil in a large stockpot. Once onions begin to soften, add spice combination (plus secret ingredient) and mix well. Add diced tomatoes. Add vegetable broth and bring to a simmer. Stir in tomato paste. Add beans, crumbles, and bay leaf and return to a simmer. Reduce heat and simmer for at least 1 hour. The longer chili cooks, the more developed the flavors become. Salt and pepper to taste. Garnish with avocado, cilantro, Tofutti sour cream, or soy cheese.

Here's another original recipe that won my husband over this week...

Roasted cauliflower with Israeli couscous
For the cauliflower:
1 head cauliflower, broken into bite-sized florets
2 T. Olive Oil
Ground cumin
Salt and Pepper

Preheat oven to 450. In a bowl, toss cauliflower with olive oil, cumin, and salt and pepper. Spread on a foil-line baking sheet. Bake for 15 minutes, or until cauliflower is fork-tender.

For the couscous:
1 c. Israeli couscous
1 T. olive oil
1 small yellow onion chopped
1/4 tsp. cumin seeds
1/4 tsp. safron threads
1 cinnamon stick
1 dried bay leaf
1 1/2 c. vegetable broth

Garnish:
1/4 c. toasted pine nuts
1/4 c. fresh chopped parsley
t tsp. fresh grated lemon zest

Heat olive oil in small saucepan over medium heat. Add onion, sautee until soft and transluscent. Add cumin, safron, cinnamon, bay leaf, and couscous. Stir ingredients over medium heat until couscous looks toasted (golden to light brown). Stir in vegetable broth and bring to a boil. Reduce heat and simmer until all liquid is absorbed, stirring frequently. Remove bay leaf and cinnamon stick. Serve topped with the roasted cauliflower, sprinkling garnishes over the entire dish.

Wednesday, October 20, 2010

Christmas DIY Update

I've begun my Christmas gift DIYs so I won't be posting those projects until after Christmas. Don't want to spoil it for the recipients, of course. But I am SO excited to make these gifts! I'm accquiring supplies and am itching to get going.

I also have a "Hearts, Hands, Pots and Pans" logo in the works to label gifts, and will share that ASAP.

Thursday, October 7, 2010

DIY Pinecone Wreath

Now comes the time of year when I'm hesitant to make too many posts about DIY projects for fear I'll spoil Christmas presents. Thankfully the purpose of this project was to enhance the outdoor aesthetics of my house.

I've been collecting pinecones for almost a year with the intent of turning them into multiple craft projects. I was inspired to create a plain pincone wreath that I could decorate according to season.

For this project, you'll need:
30-50 pinecones, various sizes
Wire floral wreath frame
Floral wire, brown or green
Wire cutters
Hot glue gun
Hot glue sticks

I began by taking the larger pinecones and attaching them to the wreath frame with wire. I alternated cones facing in and out. Where there were large gaps with the frame showing, I took small pinecones and attached them with wire to the frame. I then began layering pinecones on top of the "base layer" and attaching them with hot glue. I then loosely fixed the autumnal touches to the wreath with wire - this is so I can easily swap these out for Christmas-y accents in a few months.

Here's the finished product:


Front door fall display, complete with mums and pumpkin:

Tuesday, September 28, 2010

Veganville Bakery: Carrot, Nut, and Seed Bread

This hearty, nutritious and delicious bread is perfect for the season. Here in Middle Georgia, we're almost upon the time of year when carrots are in season and we're getting ready to shake down the pecan trees. Since I'm all about being seasonal with ingredients, I thought I'd share my take on a Joy of Cooking recipe.

Carrot, Nut, and Seed Bread
Makes One 9X5 in. loaf

1 1/2 c. all-purpose flour
1 t. baking soda
1 t. baking powder
1/4 t. ground cinnamon
3/4 c. sugar
2 eggs worth of egg substitute (3 t. Ener-G + 6 T. H2O)
1/2 c. vegetable oil
1 t. vanilla
1/2 t. salt
1 1/2 c. grated carrots*
1/2 c. flax seeds
1/2 c. (+1/4 c.) ground pecans
1 T. wheat germ

*I used the attachment for my food processor to grate the carrots to save time and energy.

Preheat oven to 350. In medium bowl, whisk together flour, baking soda, baking powder, and cinnamon. In large bowl, whisk together sugar, egg, oil, vanilla, and salt. Stir in dry ingredients. Fold in carrots, flax seeds, and 1/2 c. pecans. Crape batter into greased 9X5 loaf pan. Sprinkle top with 1/4 c. pecans and wheat germ. Bake 45 minutes to one hour (until bread pulls away from the sides of the pan). Cool in the pan for 10 minutes. Unmold loaf to finish cooling.

Saturday, September 18, 2010

The Veganville Bakery: Pumpkin Muffins

Two of my favorite things in the world come in the fall: college football and pumpkin flavored things. Even thought it's still in the mid-90's in Middle Georgia, it's no reason to NOT indulge in pumpkin things. Yesterday, I made perfect vegan pumpkin muffins. These take the cake (or muffin) as the best vegan baked good I've produced thus far.

Vegan "Punkin" Muffins
Dry ingredients:
2 c. all-purpose flour
1 T. baking powder
1/2 t. salt
1/3 c. sugar
1 t. ground cinnamon
1 t. ground nutmeg
Wet ingredients:
2 large eggs worth of egg substitute (3 t. Ener-G + 6 T. H20)
1 c. plain almond milk
2/3 c. sugar (white or brown)
1/3 c. vegetable oil
1 t. vanilla
1 c. cooked pumpkin

1/2 c. pepitas (pumpkin seeds)

Preheat oven to 400. Line a standard 12-muffin pan with paper liners. Whisk dry ingredients together. Whisk wet ingredients together in a separate, large bowl. Add dry ingredients to wet, and stir gently until combined (DO NOT OVERMIX). Fold in pepitas. Fill muffin cups. Sprinkle extra pepitas over batter in cups (optional). Bake for 18-20 minutes, or until toothpick inserted in a muffin comes out clean. Let cool before removing from pan.

These are so yummy and really filling!

Thursday, September 9, 2010

Autumnal touches

I haven't dug into any major projects since the holiday weekend, but I have been trying to touch-up the house with a little fall flair.

I picked up some fake fall foliage from Michael's (how'd ya like that alliteration?!)and have been using it sparingly around the house. Our dining room centerpiece was one place that needed a pick-me-up.


I've also been running out of ideas for ways to use our hot peppers from the garden. Then it came to me...a chili riesta. Here's the beginning of my riesta.

Last Week (or so) in Veganville

Last week I was in desperate need of comfort food. Being nearly full-blooded British, I decided Shepherd's Pie was in order.

Vegan Shepherd's Pie
1 large baking potato, cubed
2 T. margarine (I like Earth Balance)
2 T. Tofutti sour cream
1 T. chopped fresh chives
1 large carrot, peeled and chopped
1 stalk celery, chopped
1 c. Baby Portobello mushrooms, sliced
1/4 c. white onion, chopped
1 T. garlic, minced
1/2 c. frozen peas
1/2 c. vegetable (or mushroom) broth
1 sprig fresh Thyme
Olive oil
salt and pepper

Preheat oven to 375. Place potato in large saucepan and fill with water. Bring potato and water to a boil; boil until potatoes are fork tender. Drain potatoes. Mash with margarine, sour cream, chive, salt, and pepper. Set aside.
In medium-large saucepan, heat olive oil over medium heat. Add onion, garlic, celery, carrot and mushrooms. Cook until vegetables are tender. Add vegetable broth and thyme sprig. Simmer for 10 minutes. Add peas; cook until fully heated. Salt and pepper to taste.
Pour vegetable mixture into medium-sized casserole dish. Spoon potato mixture over the top and smooth with spatula. Bake in oven for 15 minutes. Enjoy!

This made about 3-4 1 cup servings. Expand amounts as necessary for your family, or try swapping different veggies based on preference or what's in season! Lately, I've been substituting leeks for onions in recipes.

Tuesday, August 31, 2010

Canned Creations

My first attempts at canning have been a success in the sense that all of my jars have sealed (depressed or "innie" button). Being that it's kind of hard to stick your finger in to taste a boiling pot of syrupy water, I have yet to taste anything. So far I'm leaving it up to chance and the honesty of close friends and relatives (yes, I've already given some away as gifts).

My first canning creation was pickled jalepenos and pickled okra. I followed a simple, all-purpose-pickling recipe from "Joy of Cooking." I didn't have any pickling spice so I forged my own picling spice using what I had on hand.

Kate's Pickling Spice
1 cinammon stick
1 bay leaf
5 whole peppercorns
10 whole mustard seeds
3-5 whole cloves
5 whole corriander seeds
1 whole allspice

Place ingredients in a small swatch of cheesecloth. Tie ends together with kitchen twine. Use based on recipe.


My second canning creation was Hot Pepper Jelly. I combined concepts and ingredients from both "Joy of Cooking" and the recipe on the pectin package. Since I had an overabundance of hot peppers, I used a combination of cayenne, jalepeno, and serano peppers and did not include bell peppers. I have yet to try a sample of the finished product, but I'm sure it is HOT! My hot pepper jelly appears to have set properly, but I'm a little frustrated at its appearance nonetheless. I was hoping for more suspended solids.


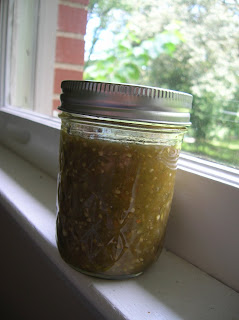
I've been told I need to bottle-up my salsa recipes, and finally, I took it literally. Our tomatoes are done (as mentioned in the previous blog post), but the tomatillos keep on coming. Here's my recipe for salsa verde.

Salsa Verde
2 cups of chopped tomatillos
1 clove garlic
1 green bell pepper
2 serano peppers (seed and devein optional depending on how hot your like your salsa)
Juice from one lime
2 T. fresh cilantro, chopped
2 T. sugar
salt and pepper to taste

Combine first 4 ingredients in a food processor. Pour mixture into a small saucepan, and bring to a simmer over medium-low heat. Add lime juice, sugar, salt, and pepper. Simmer for about 5 minutes. Turn off heat and gently stir in cilantro. Can according to your typical process.

Tuesday, August 24, 2010

Garden Update

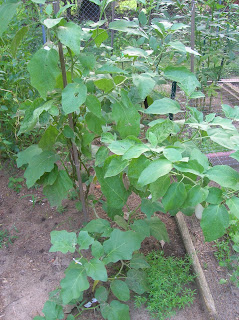
I realized I haven't posted in a while about the garden. Fortunately, unlike the rest of my life, the garden has gotten out of control! I kindly refer to the eggplant, okra, and basil as trees and to the tomatillo as "the big green monster." Since my husband has been away, I honestly have not applied a single fertilizer, insecticide, or herbicide. Surprisingly enough, the plants keep on growing. (I do weed and prune from time to time - go me!)

Our tomatoes are done for the season, but our eggplant, okra, tomatillos and peppers continue to produce. Sometimes I'm not quite sure what to do with all of them, so I've started dabbling with canning. So far I've pickled okra and jalepenos, and I'll find out in a few weeks how they actually taste! If they're decent, I'll share the recipe. If they're a complete failure, I'll pretend like it didn't happen.

Fall/winter veggies I started from seed seem to be doing okay. I think it's been way too hot for some of the seeds, especially peas and carrots. Hopefully in a few weeks I'll start harvesting greens and pole beans. Here are some recent photos:


Thursday, August 19, 2010

DIY Faux Headboard

My apologies for the long hiatus. My first week back after vacation has really sapped me of any motivation for non work-related projects. Thankfully I have one in reserve!

The bed in our masterbedroom is without headboard. And I've never been happy with whatever picture we've tried hanging over the bed to fill that space. Recently I saw an idea on www.thenest.com - create a faux headboard by stretching fabric across a frame and hanging it over the bed. I thought I'd give it a whirl.

Originally I wasn't quite sure how I'd go about making the frame. I've never been great at carpentry-type projects involving 2x4s. But just as luck would have it I found two large canvases in the clearance pile at Michaels.
I decided to use the fabric from my favorite tapestry (I bought it several years ago at Urban Outfitters). First, I ironed the tapestry, then cut enough fabric to stretch over both canvases. I stretched the fabric over the canvas and stapled it to the wood frame using a heavy-duty staple gun.

Here's the finished product hanging over the bed. I think it still looks incomplete, so I'm contemplating my next step to make it look more polished. Suggestions are welcome!

Thursday, August 12, 2010

Last Week (or so) in Veganville


Probably the most difficult two weeks in Veganville yet...vacation!

Vacation started in San Antonio, Texas. My first meal there, I went out to breakfast with an old friend. Our catch-up location of choice was Central Market (http://www.centralmarket.com). A foodie's dream market, but I struggled a little as a vegan. We both ended up getting a falafel, pita, hummus, taboulea, and stuffed grape leaf platter. I was so excited considering I haven't seen falafel offered anywhere in Middle Georgia. The falafel, however, was a little dry and disappointing. The coffee, though, was sooooooooooo delicious. (In Middle Georgia, our coffee offerings are limited to the big green monster, a.k.a Starbucks, and whatever is available in the grocery store)

Lunch was a little disappointing. I was at the mercy of my travel companions, so we ate at the food court in the mall right on the River Walk. I had avocado sushi.

Dinner, however, was MINDBLOWING! Such vegan goodness! We went to The Cove (http://thecove.us/cove/index.php), which has been featured on Food Network's Diners, Drive-ins, and Dives. This unique little restaurant/bar/car wash/laundromat was just what the doctor ordered. Thursday nights, they have Vegan Night when the chef prepares a unique vegan dish. They do have vegan offerings on their regular menu too. This past vegan night, the menu included lentil burger with sweet potato fries and a peach-rhubarb crisp with avocado cream. What a happy little vegan camper I was!

Outside of San Antonio (where I spent the majority of my vacation), my vegan choices in restaurants were primarily limited to side salads and plain baked potatoes. I did discover a vegan gem at the local Walmart. Soy Chorizo! Frieda's Soyrizo (http://www.friedas.com) is something I will definitely keep an eye out for (or order) in the future. It has great seasoning and texture and was even pleasing to the meat-eaters of the group.

I did cave on a few ocassions and indulge in ice cream and locally caught sea food (I figure if I'm going to eat meat, it might as well be sustainable). Before I ate my fish, I thanked it for providing me with a meal and apologized for any pain it may have experienced. It helped me feel a little less guilty. Call me crazy, but I think we ought to do that every time we consume an animal product. It's about being conscious. Your food gave it's life for you.

Monday, August 2, 2010

Hey Mr. Postman!


This may perhaps be the ugliest mailbox I have ever seen. And guess whose house it stands in front of? That's right, mine. What were the previous owners thinking??
My husband and I had discussed for months about replacing the mailbox, but never got around to it. Finally, I'd had enough of this curbside eyesore. So I decided to repaint the darned thing.

Steps to the repaint:
1. Sand chipping paint and rust.
2. Spray with primer designed for rusty metals

3. Spray with rust-resistant, outdoor metal paint

4. Monogram

For the monogram, I went very low tech. I created a MS Word document, found a font I liked, printed it out, and cut out the letters to make a stencil. I placed the stencil on the mailbox and sprayed away.

It may not be the nicest looking mailbox in the world, but it's a whole heck of a lot better than what we had. Hopefully this will last us until we break down and buy a fancy mailbox.

Tuesday, July 27, 2010

DIY Night Stands

About a week and a half ago, I went a little crazy with DIY design projects around the house. I moved furniture, hung artwork, and created new pieces. It was honestly difficult to stop myself short of painting every room in the house.

When I moved furniture around, I swapped out the nightstands in the master bedroom, but had nothing to swap back in. The remedy? I found cheapo little nightstands/end tables at Ross with potential. And by "potential", I mean they were hideous, but I knew I could summon my inner artist and revamp them.

I gave myself a clean palate by spray painting the entire thing black. Inspired by the many Russian and Kazakh folk art pieces already in my house, I painted a new design using acrylic paint.

Here are the before and after pictures, respectively:


Bonus Recipe

Just to piggyback on my most recent Veganiville recipe, here's a variation on tofu scramble that's unique, spicy, and fun!

To preface the recipe a little more: I picked up two tomatillo plants when we were first planting the garden, and they have turned into massive, fruit-producing plants. Tomatillos are the little guys commonly used to make salsa verde. Not many people realize that tomatillos are actually not little green tomatoes, but more closely related to gooseberries, kumquats, and persimmons. They're not very pleasant to eat raw, so you have to cook them to break down the tough skin and fibrous interior. But once you do that, they have this fabulous lemony flavor. (They also have this papery outer husk you have to peel before cooking)

Anyway, onto the bonus recipe of the week:

Green Tofu Scramble
1 c. firm tofu, crumbled
1/2 c. tomatillos, chopped
1 T. garlic, minced
1 serano pepper, chopped
1 T. oil (veg. or olive oil)
Fresh cilantro

Sautee tomatillos, garlic, and the serano in a pan with oil. Cook until tomatillos are very soft. Add tofu and cook until hot. Garnish with fresh cilantro.

This recipe has so many dynamics between the lemony tomatillos, spicy serano, and perfect fresh compliment from the cilantro. Hope you enjoy!

Saturday, July 24, 2010

Last week in Veganville

This past week in Veganville was pretty boring. We have an overabundance of tomatoes coming out of our garden right now, so I've been trying to come up with different ways to use them. I made pasta sauce, I made chilli, I made salsa, and I ate them raw. But this past week I had jury duty for 3 days and went in a different direction with the tomatoes - mostly out of convenience, and party out of craving.

When I lived overseas, my Chinese friends would make this dish that consisted of tomatoes and eggs. They would sautee the tomatoes and then crack eggs into the pan so the eggs kind of poached and scrambled at the same time in the stew-y tomatoes. It was Yummy, with a capital "Y".

Since I'm not eating eggs, I pondered how I could recreate this dish. Duh - Tofu! This week, I ate this for breakfast, lunch, and dinner. I ate it with toast, I ate it with chapati (Indian bread), I ate it with homemade oven fries. I'm even craving it as I write this.

Tomatoes and Tofu
1 block firm tofu
2-3 medium tomatoes, cut into 8ths or 16ths (depending on the size of the tomatoes)
1 tsp. EVOO (Extra Virgin Olive Oil)
1 tsp. garlic powder (you could also substitute fresh minced garlic)
1/2 tsp. ginger
salt (Kosher) and pepper to taste

Heat EVOO in a sautee pan over medium heat. Add the tomatoes; sautee until stewed-looking. Add the tofu, breaking into small crumbles as you mix in. Add garlic powder, ginger, salt, and pepper. Sautee until tofu is hot.

This takes about 10-15 minutes total to throw together. It's super easy, super healthy, and super filling. I hope you enjoy!

Wednesday, July 21, 2010

Like Two Peas in a Pot

Sometimes it's hard to wrap my head around the extremely long growing season here in Middle Georgia. Last weekend, I started planting for fall/winter veggies. I had two large planters and two trellises left over from our wedding that I was finally able to put to good use. In one, I planted English peas, in the other, pole beans. After only a few days, I have germinating seeds! I haven't been this excited about germinating seeds since my 8th grade science fair project! (Which, by the way, was about how bacteria affects seed germination). Here are some photos of this little gardening project:


Sunday, July 18, 2010

DIY Potpourri

And I mean "potpourri" in the literal sense, not as a synonym for "miscellaneous".

Anyway, our herb garden has gotten a bit out of control. Trust me, I love (and I mean really, really love) fresh herbs, but our plants have become a viscious mass overgrowing the bounds of their raised beds. I don't even bat an eye when I run over them with the lawn mower. They just keep growing! I've been challenged to use them on a daily basis, but there are only so many ways you can get creative with pesto and only so many times you can make it.

So I finally decided to start drying them. Perfect! I'll never have to buy a dried herb ever again.

But I got a little distracted. The herbs looked so pretty hang-drying in my kitchen window. And the smell was so lovely, I just wanted to bottle it up! So I did. And voila: Potpourri!

Steps to simple DIY potpourri:
1. Pick fresh herbs (I used mint, lavendar, and rosemary)
2. Hang-dry herbs
3. Once dry, hand-crush and mix herbs together in a jar
4. Beautify the jar


Tuesday, July 13, 2010

DIY Dog Treats: Update

So my mother, who is the author of many great and creative ideas inspired me to take my dog treats to another (i.e. more cute and convenient) level.

Instead of putting the yogurt-banana mixture on a baking sheet and freezing them, she suggested freezing the mixture in ice cube trays. Brilliant! I was all about finding traditional ice cube trays, but stumbled across these at Walmart and thought they were too cute to pass up:


And because I think I can't have too many pictures of my dogs, here's another picture of the happy customers: