I don't know much about cars, but thankfully, Marcus does. Ever since we got married, Marcus has taken it upon himself to change the oil in our cars. As a non-mechanically-inclined woman, I am in complete awe!
I know plenty of people would see DIY oil changes as a hassle, waste of time, and would much rather bring it to a dealer's service department. Surprisingly enough, (from my perspective) DIY oil changes are pretty simple. "How does one learn to DIY oil change?" you may ask. Marcus learned "in theory" from his dad, but continually consults the manual for our cars (thankfully we have the same car). Specific make/model manuals can be purchased at your local auto supply store. Also, there are plenty of how-to videos on the internet nowadays. For example: http://www.youtube.com/watch?v=Ptw-BR2u4qQ
So why do we DIY our oil changes?
Time saver. Marcus has it down to a science now so it takes him about a half hour on each car. Much shorter than waiting at the dealership.
Money saver. Obviously, we save on the labor charge, but we also save on the cost of the oil and filters. Not only that, but we get to choose a higher quality oil for the same cost as run-of-the-mill oil at the dealership or lube shop. Up-front, we only save about $10 per oil change (every 3 months or so). But in the long run, we save quite a bit of money along the lines of better gas mileage and car longevity (using premium oil and filters).
We order our oil and filters directly from www.amsoil.com . Check out some of their cost comparisons on their website.
The only downsides to a DIY oil change are the oil spots left on my driveway and in my carport. But never fear, they make stuff to put on it - or good ol' kitty litter works just as well.
Wednesday, May 26, 2010
Wednesday, May 19, 2010
Ladies and Gentlemen, we have veggies!
Though not yet ripe enough to harvest, we're getting close on a few plants. We are SO excited! We've already begun using herbs from our more prolific plants - basil, cilantro, thyme, and mint - and are probably at a point where we can start making salads from our lettuce plants. Yay! Here are some recent pictures from my camera (I'll add more pictures from Marcus' camera soon).

The first of the Roma tomatoes.

The "Big Hoss" (my nickname for it, not the official name)

Lovely squash/zucchini blooms

Attack of the Lace Bugs! Poor cabbage!

Hooray for eggplant!

Lovely lettuce.
More pictures to come! Our praying mantis have hatched!

The first of the Roma tomatoes.

The "Big Hoss" (my nickname for it, not the official name)

Lovely squash/zucchini blooms

Attack of the Lace Bugs! Poor cabbage!

Hooray for eggplant!

Lovely lettuce.
More pictures to come! Our praying mantis have hatched!
Tuesday, May 11, 2010
Popsicle Update
Just the thought of trying to "putz" with making my own popsicle molds made me frustrated. So I broke down and bought popsicle molds. Only $2.99 at Bed, Bath, and Beyond!


Wednesday, May 5, 2010
Vegetable Garden
The day we first looked at our house this past November, we both agreed that the back corner of the yard would be a perfect place for a vegetable garden. And wouldn't you know it, five months later we have a lovely little plot.
Back in March, Marcus marked off the plot. In early April, we bought a heavy-duty tiller and tilled the plot. About a week after that, Marcus and a friend picked up compost and manure and tilled it into the soil. Shorty thereafter, we planted 10 tomatoes, 2 tomatillos, 10 yellow squash, 10 zuchini, 10 okra, 10 cucumbers, 4 eggplant, 2 lettuce, 2 cabbage, 2 hubbard squash, 2 cantelope, and 10 peppers. Already, most plants are flourishing although some are struggling (cantelope and okra). This project isn't a 100% DIY, but folks have been asking about our garden. Here are a few pictures:

The plot on a sunny day.

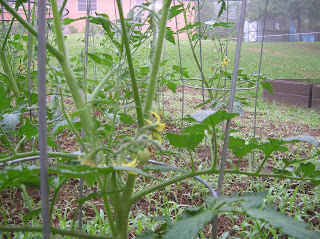
The garden on a misty May morning.

The first little tomato!
Flowering tomatillos and tomatoes.

Flowering eggplant.

The first of the peppers!

Oh right, we have an herb garden too!
Back in March, Marcus marked off the plot. In early April, we bought a heavy-duty tiller and tilled the plot. About a week after that, Marcus and a friend picked up compost and manure and tilled it into the soil. Shorty thereafter, we planted 10 tomatoes, 2 tomatillos, 10 yellow squash, 10 zuchini, 10 okra, 10 cucumbers, 4 eggplant, 2 lettuce, 2 cabbage, 2 hubbard squash, 2 cantelope, and 10 peppers. Already, most plants are flourishing although some are struggling (cantelope and okra). This project isn't a 100% DIY, but folks have been asking about our garden. Here are a few pictures:

The plot on a sunny day.

The garden on a misty May morning.

The first little tomato!

Flowering tomatillos and tomatoes.

Flowering eggplant.

The first of the peppers!

Oh right, we have an herb garden too!
Sunday, May 2, 2010
Hanging Plants
We give and receive them as gifts for Mother’s Day, teacher’s gifts, thank-you gifts, and summer birthdays. But what’s the point in buying ready-made ones when they’re terribly easy to do yourself? Planting yourself allows you to add a personal touch by choosing the plants and the colors.
When we moved in the previous owners left three (dead) hanging potted plants on the front porch. How kind! I decided something needed to be done with the eyesore. Instead of buying new hanging pots, I opted to reuse the ones left behind.
To start, I emptied the old plants, scrubbed the inside of the pots with a coarse brush, and rinsed with a hose. I then filled the pots half-way with potting soil, carefully placed the plants, and filled in around the plants with more potting soil.
Things to consider when choosing your plants:
Oh How much sunlight will your pots be exposed to? Our hanging plants are located under the roof, so they never receive direct sunlight. I chose two shade and one partial sun plant.
Th What are the plant spacing requirements and how big are your pots? Knowing this will help you determine how many plants to put in each pot. For the asparagus fern and other non-flowering plant (I forget its name), I put 3 plants in each pot. For the impatiens, I could fit 2 small palettes (12 plants) in the pot.
Ch What's the "look" you want to achieve? Choose ferns for a fuller, cascading look. For just a splash of color, pick up some inexpensive annuals (impatiens, marigolds).
I’m more or less new to gardening so any tips are welcome! Here are some pictures of our hanging plants:


Subscribe to:
Posts (Atom)
